Sendinblue Integration
Overview
The Sendinblue integration will let you sync your contact form with your Sendinblue account. When you visitors will submit the contact form, the information will be pushed to one of your Sendinblue lists.
Here is how you can set it up.
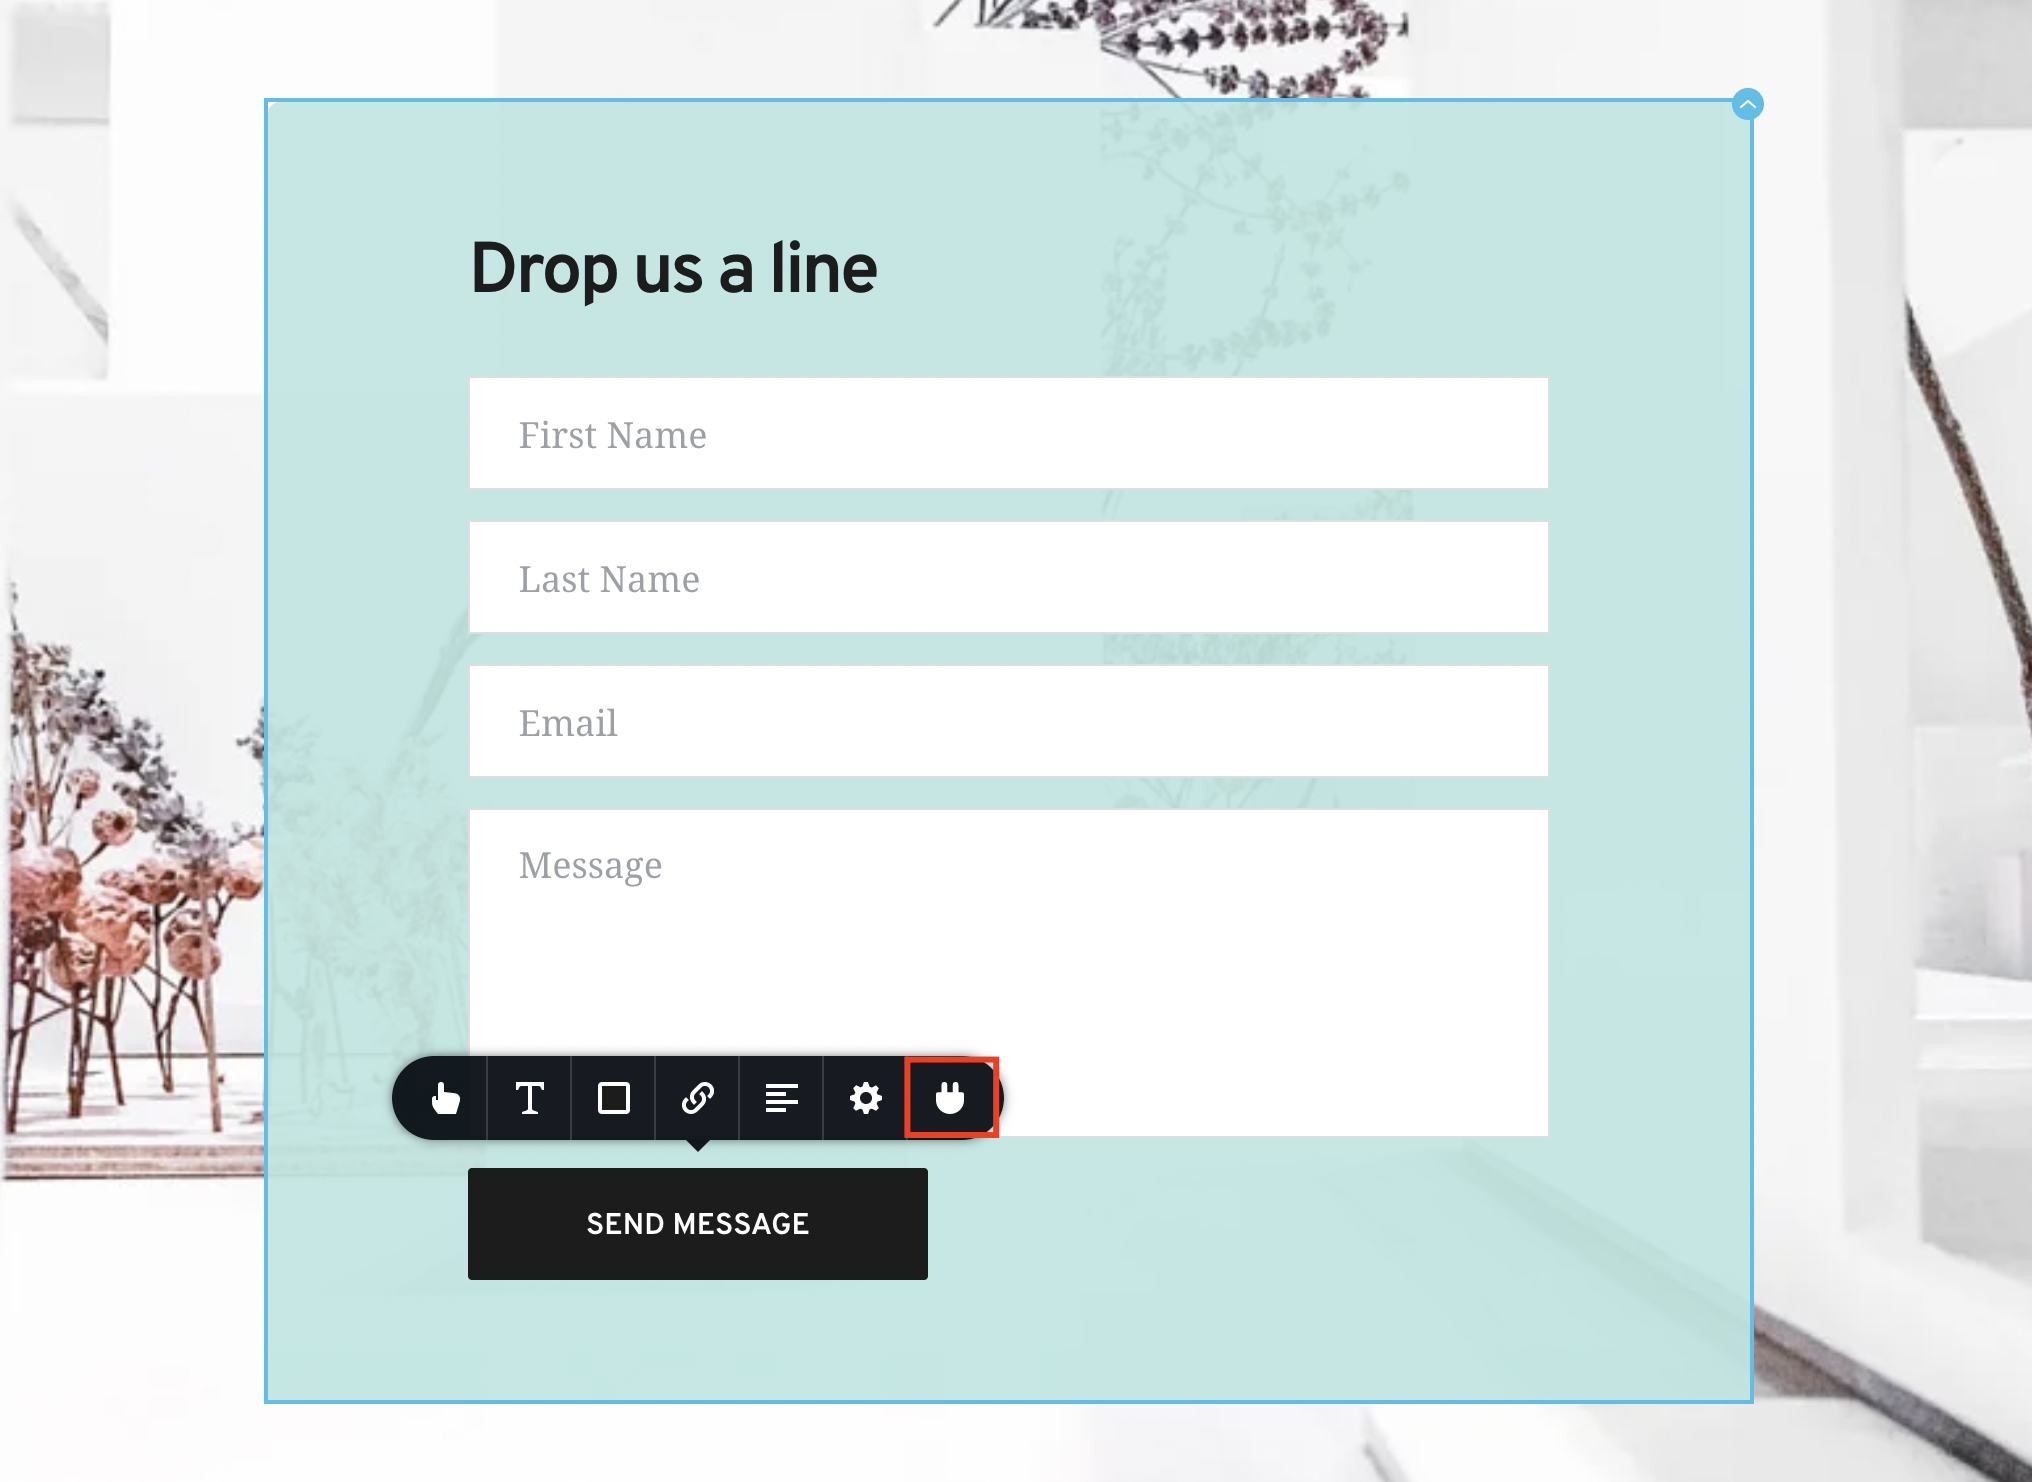
Step 1.
Access the Integration Apps on the button of any contact form element in the JoEve builder
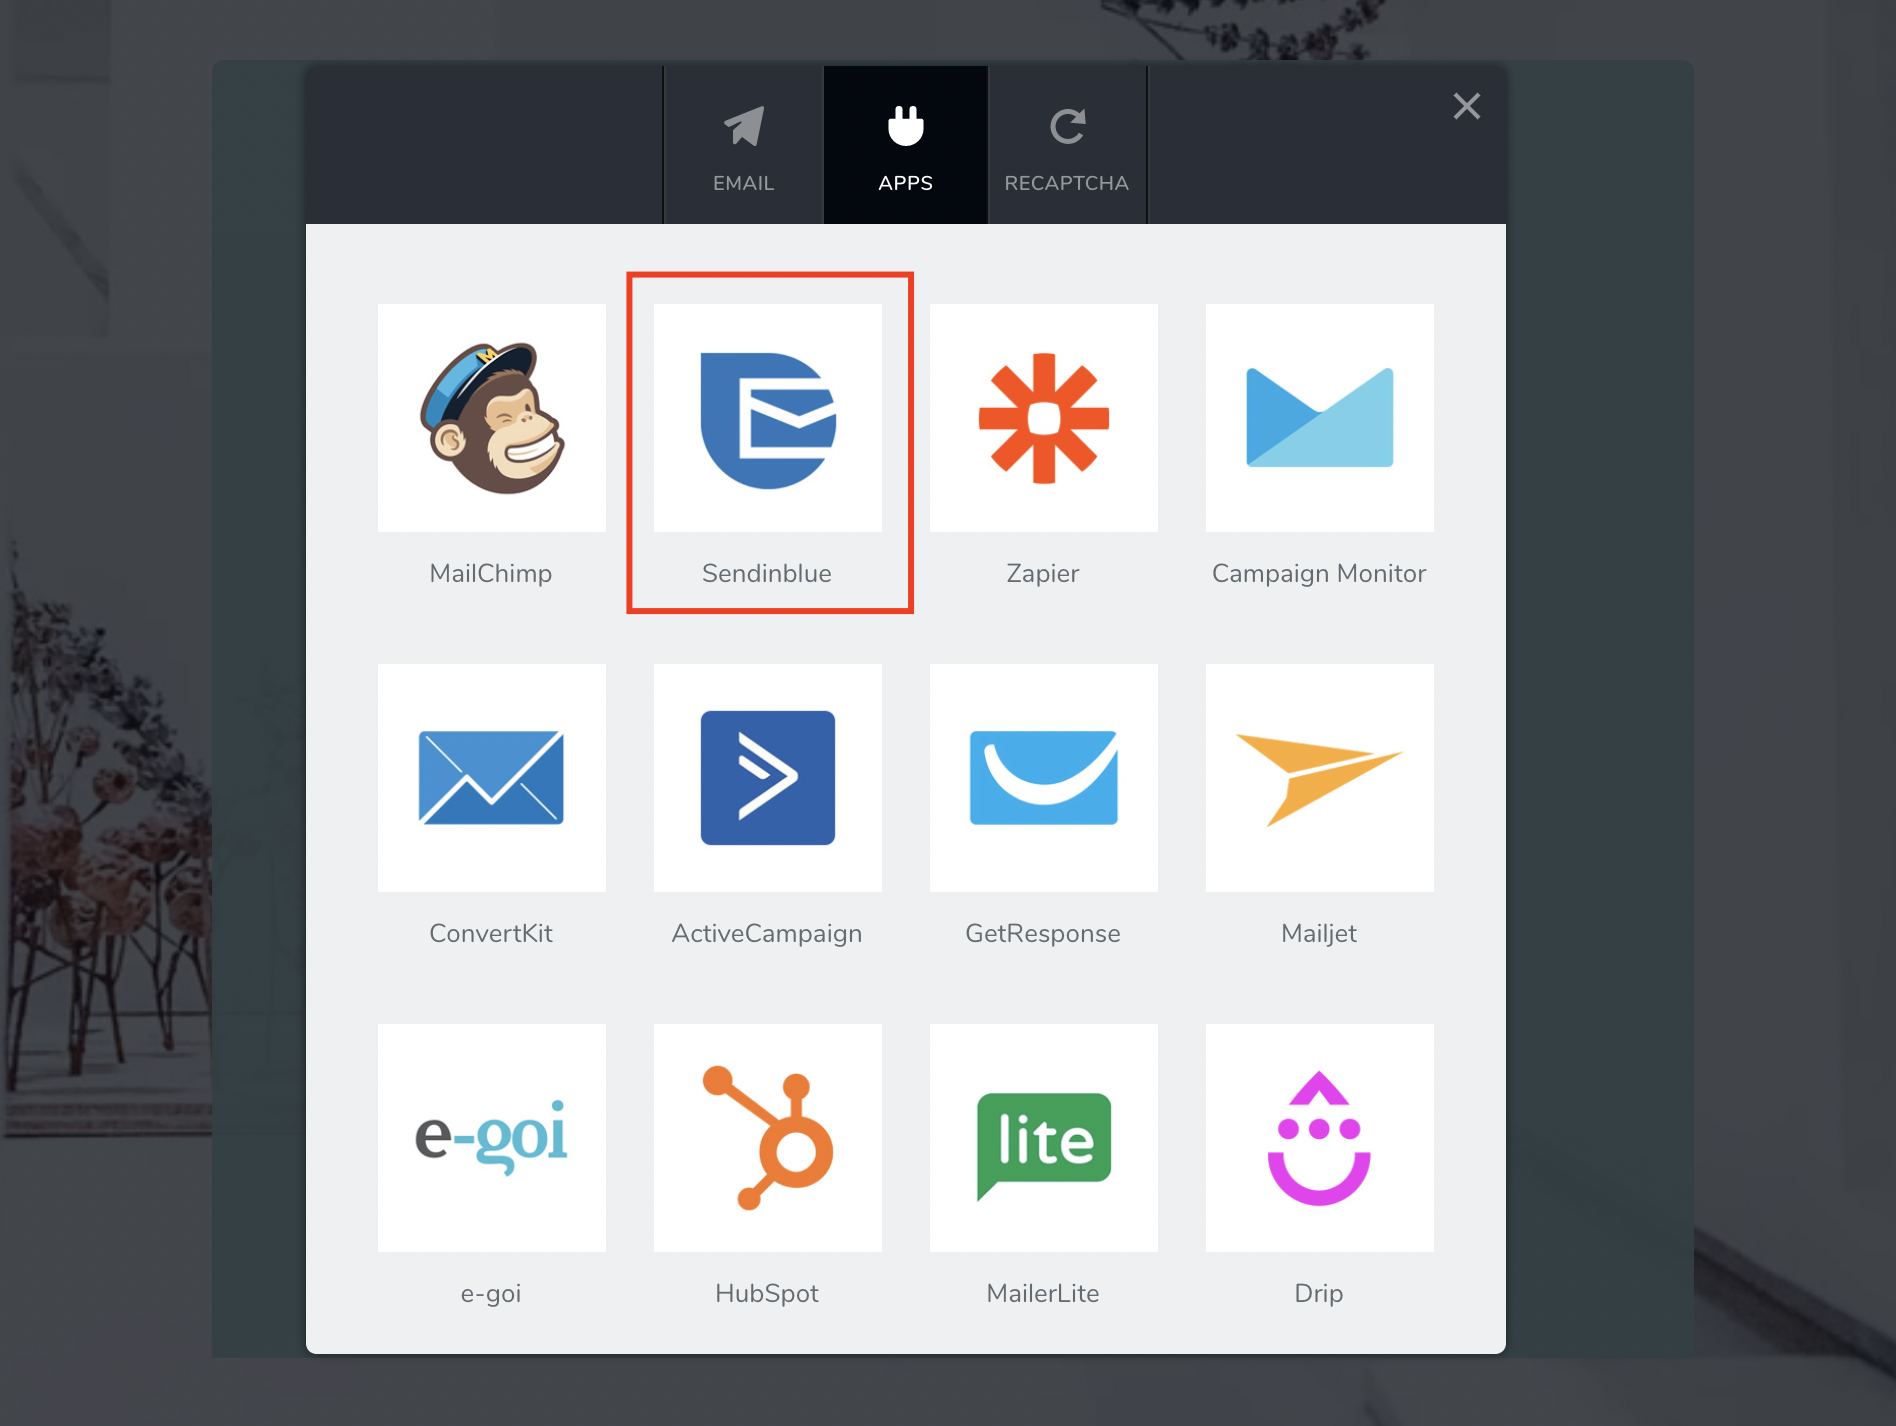
Step 2.
Go to the Apps tab and select Sendinblue
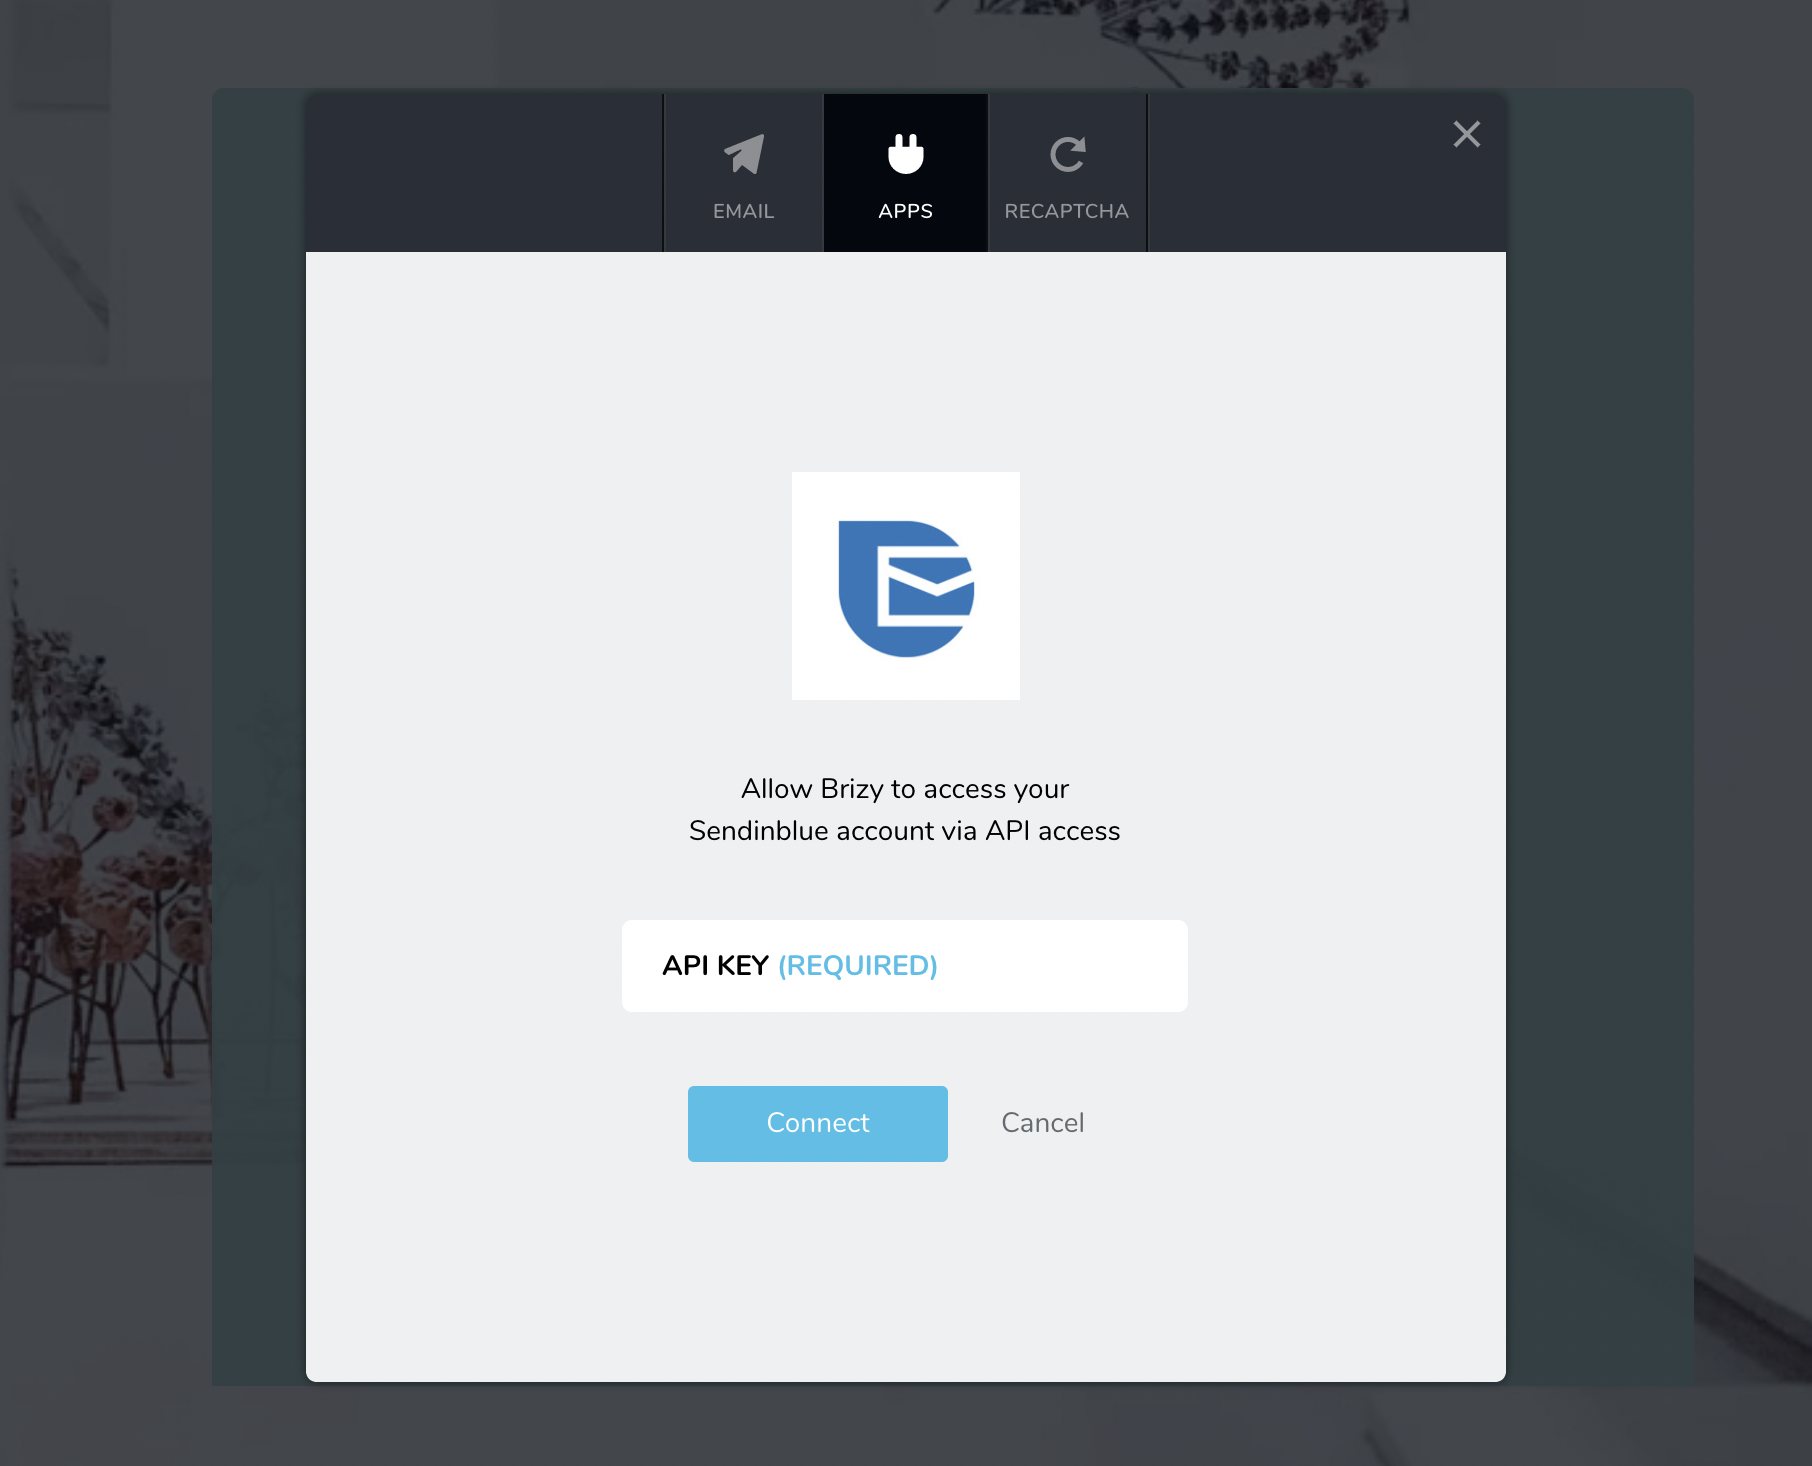
Step 3.
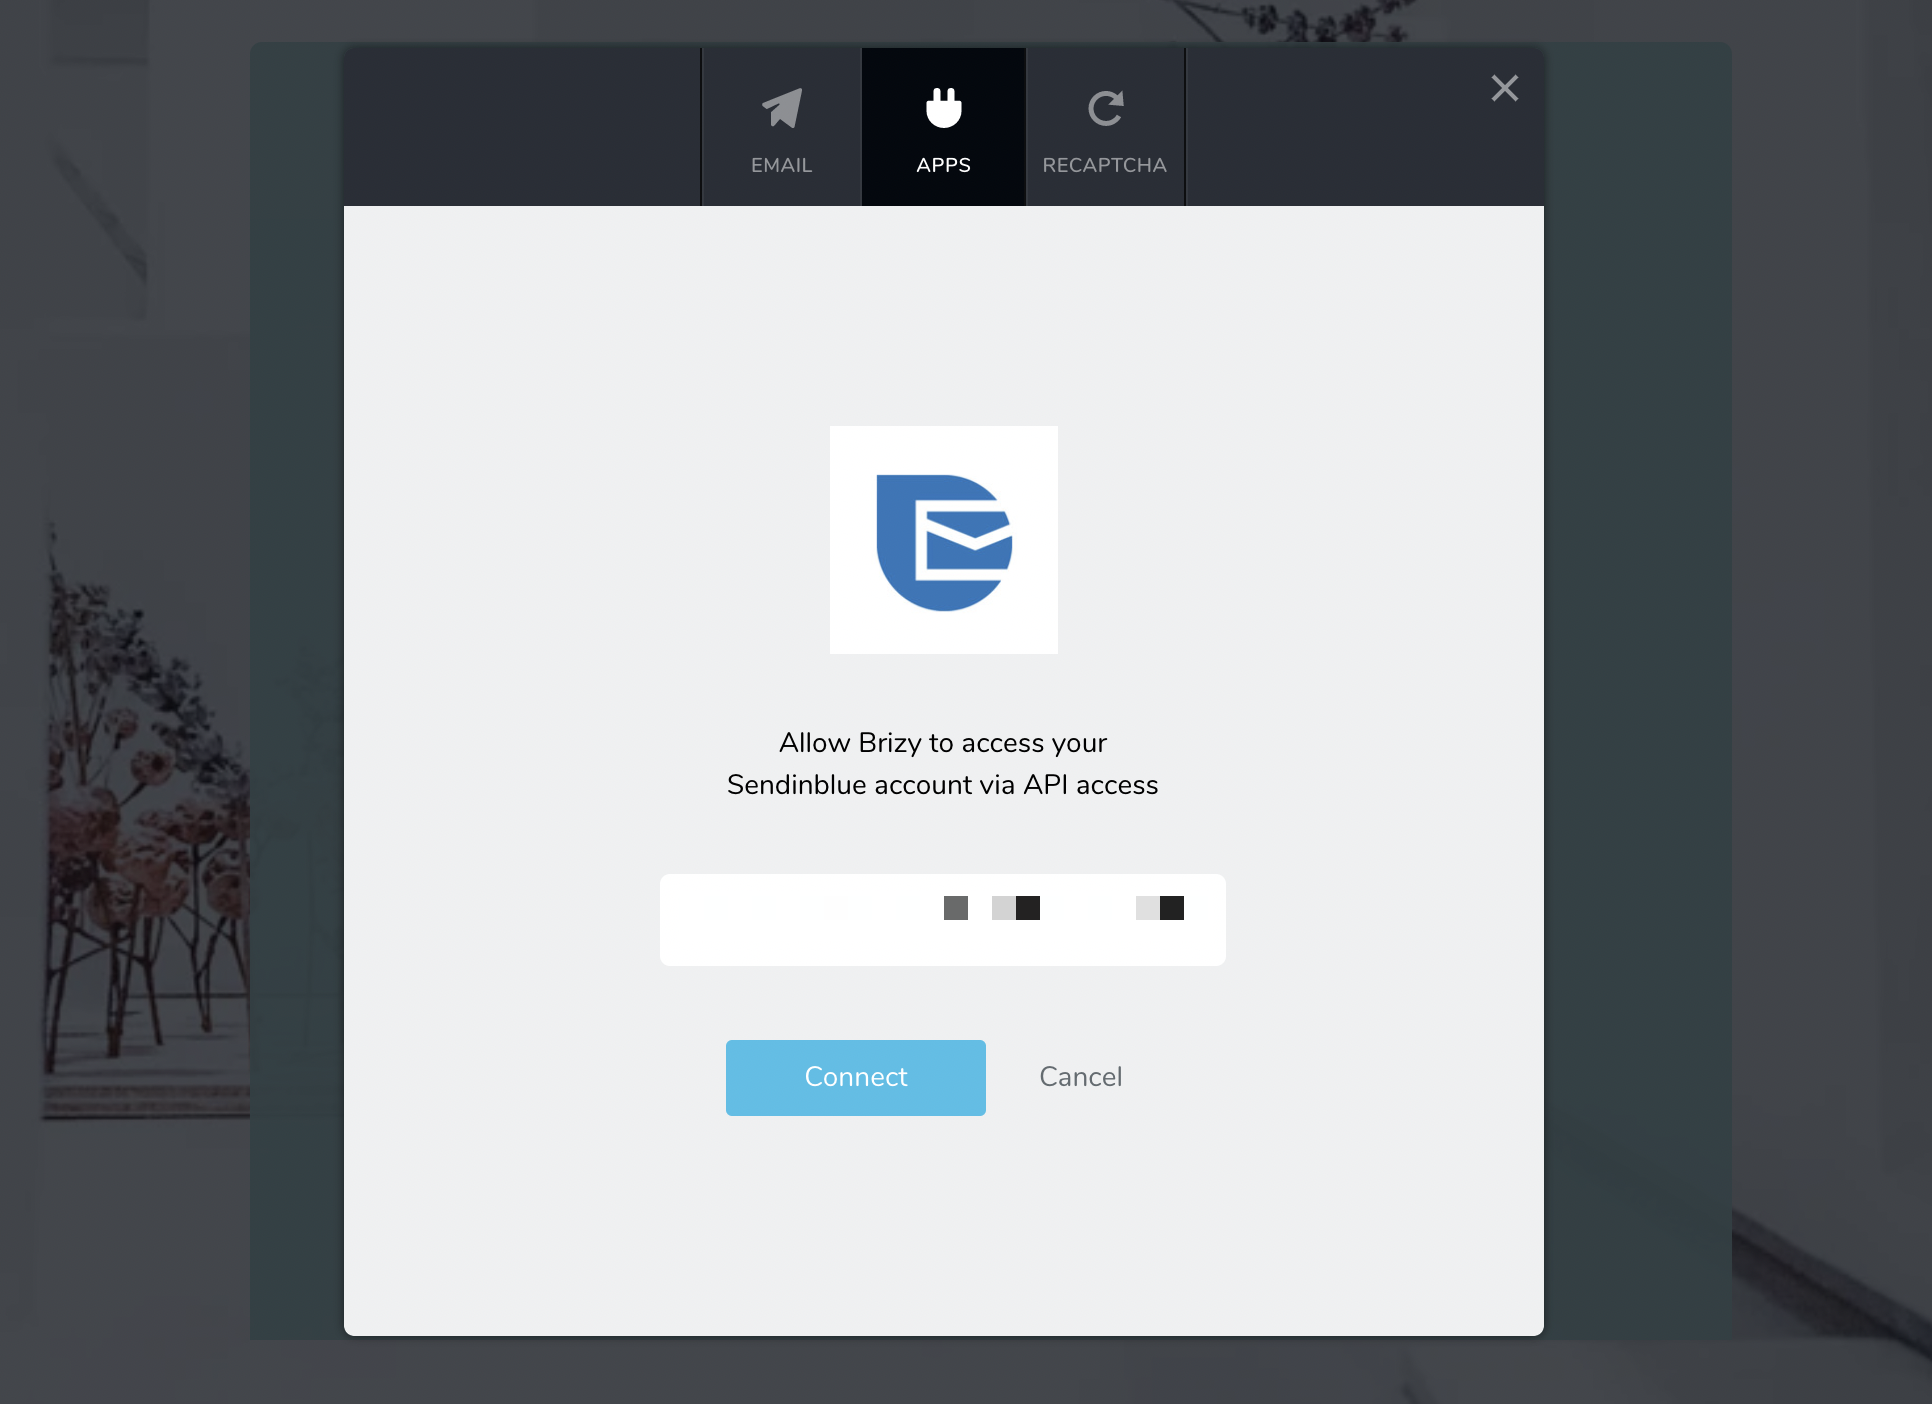
Here is where you’ll need to input your Sendinblue API key to allow JoEve to push your contact form details into one of your Sendinblue lists.
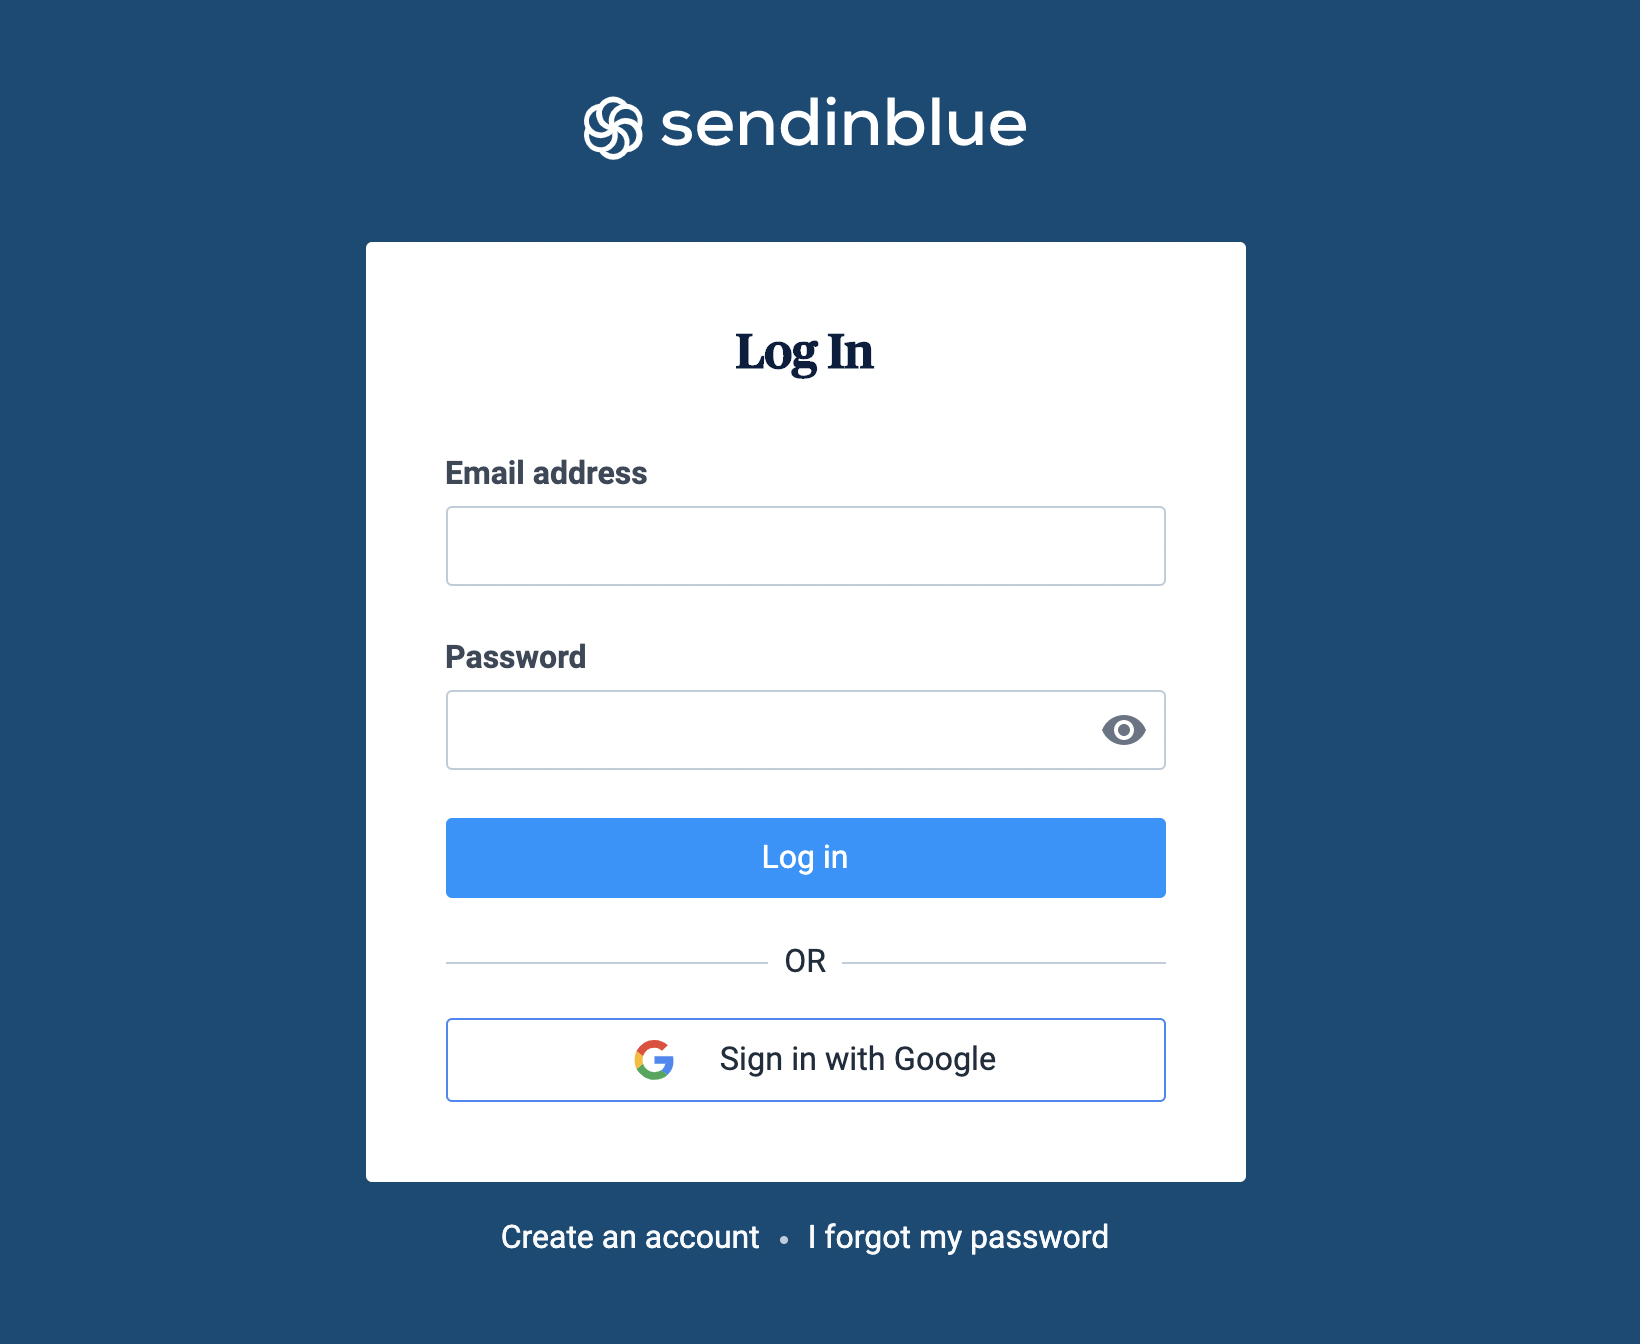
Step 4.
Login into your Sendinblue account
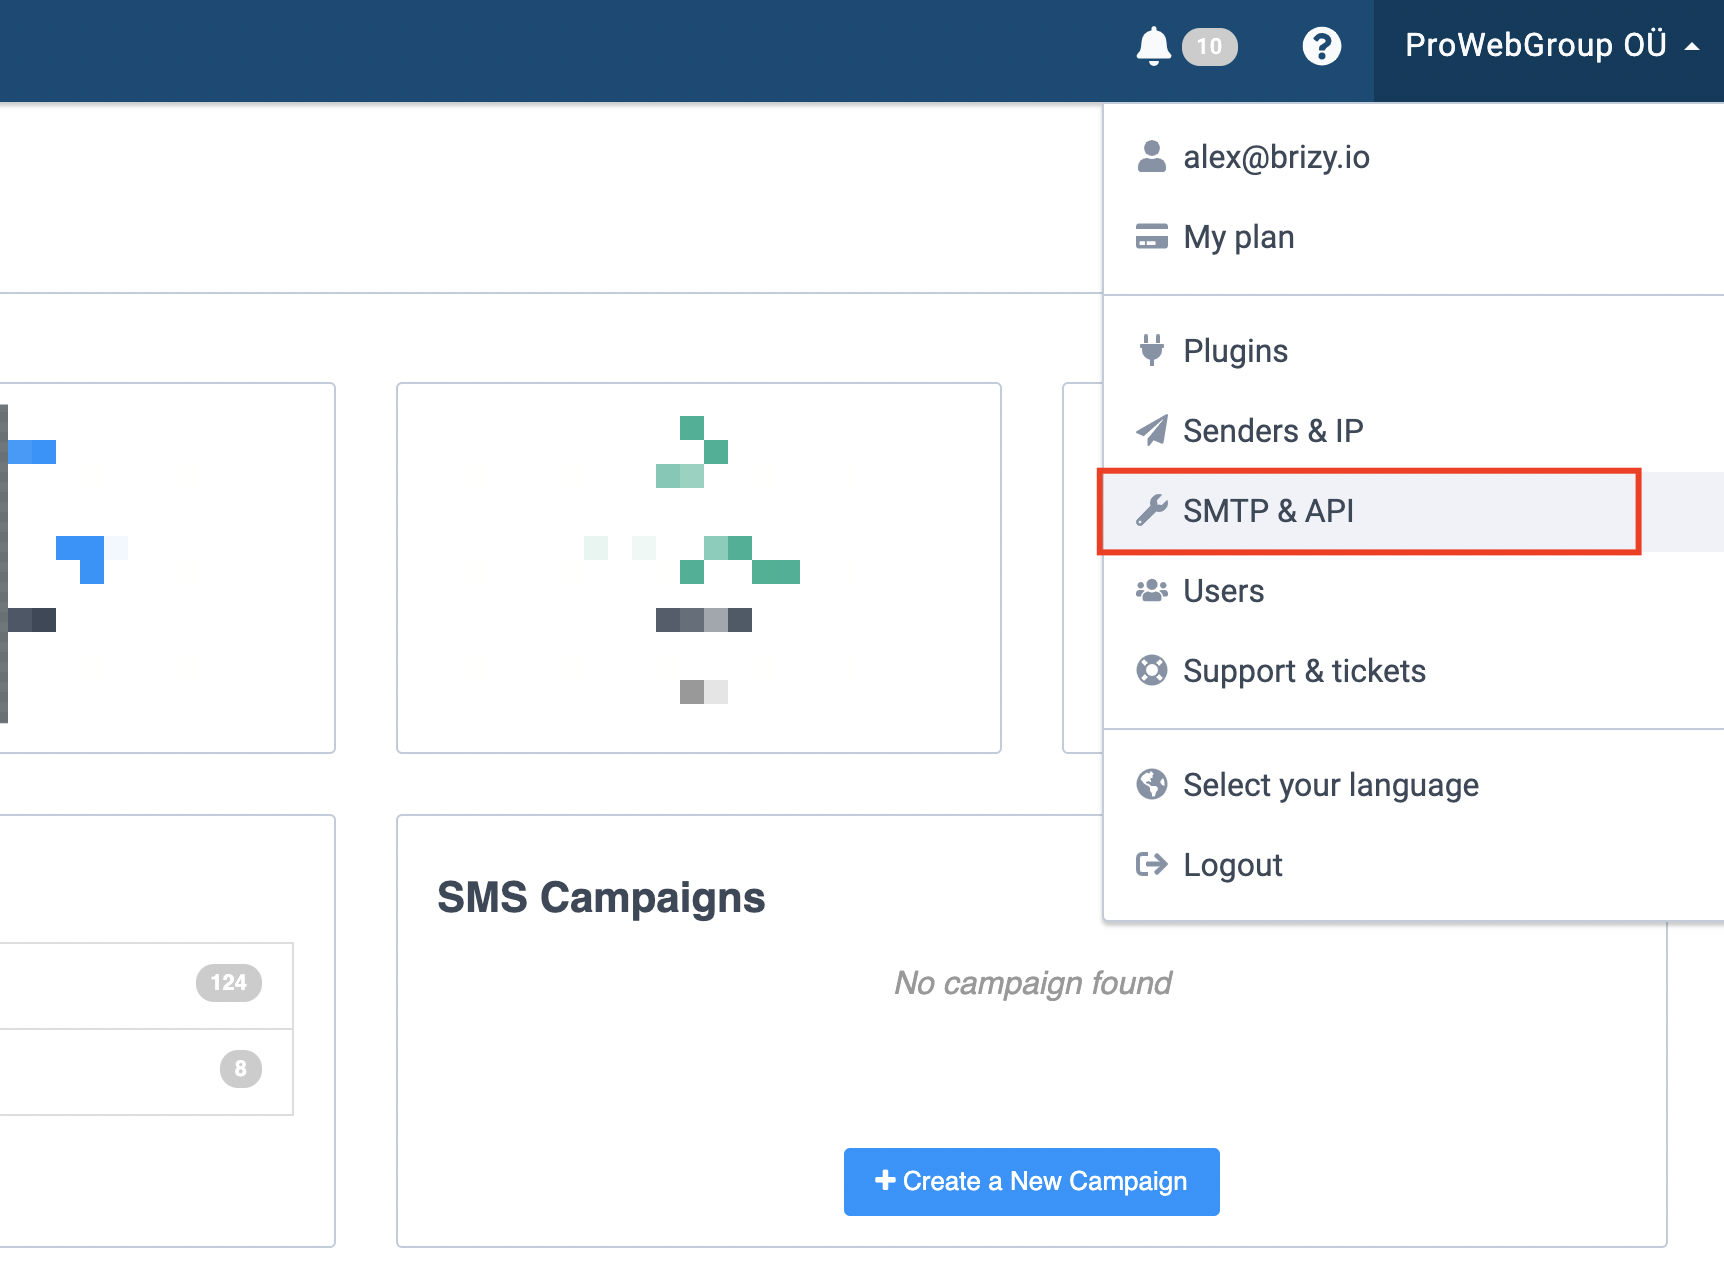
Step 5.
Go to SMTP & API in the top right
Step 6.
Create a new API key

Step 7.
Copy/Paste the API key into your JoEve Integration window and press Connect.
Step 8.
Check if the correct account is selected and press Continue

Step 9.
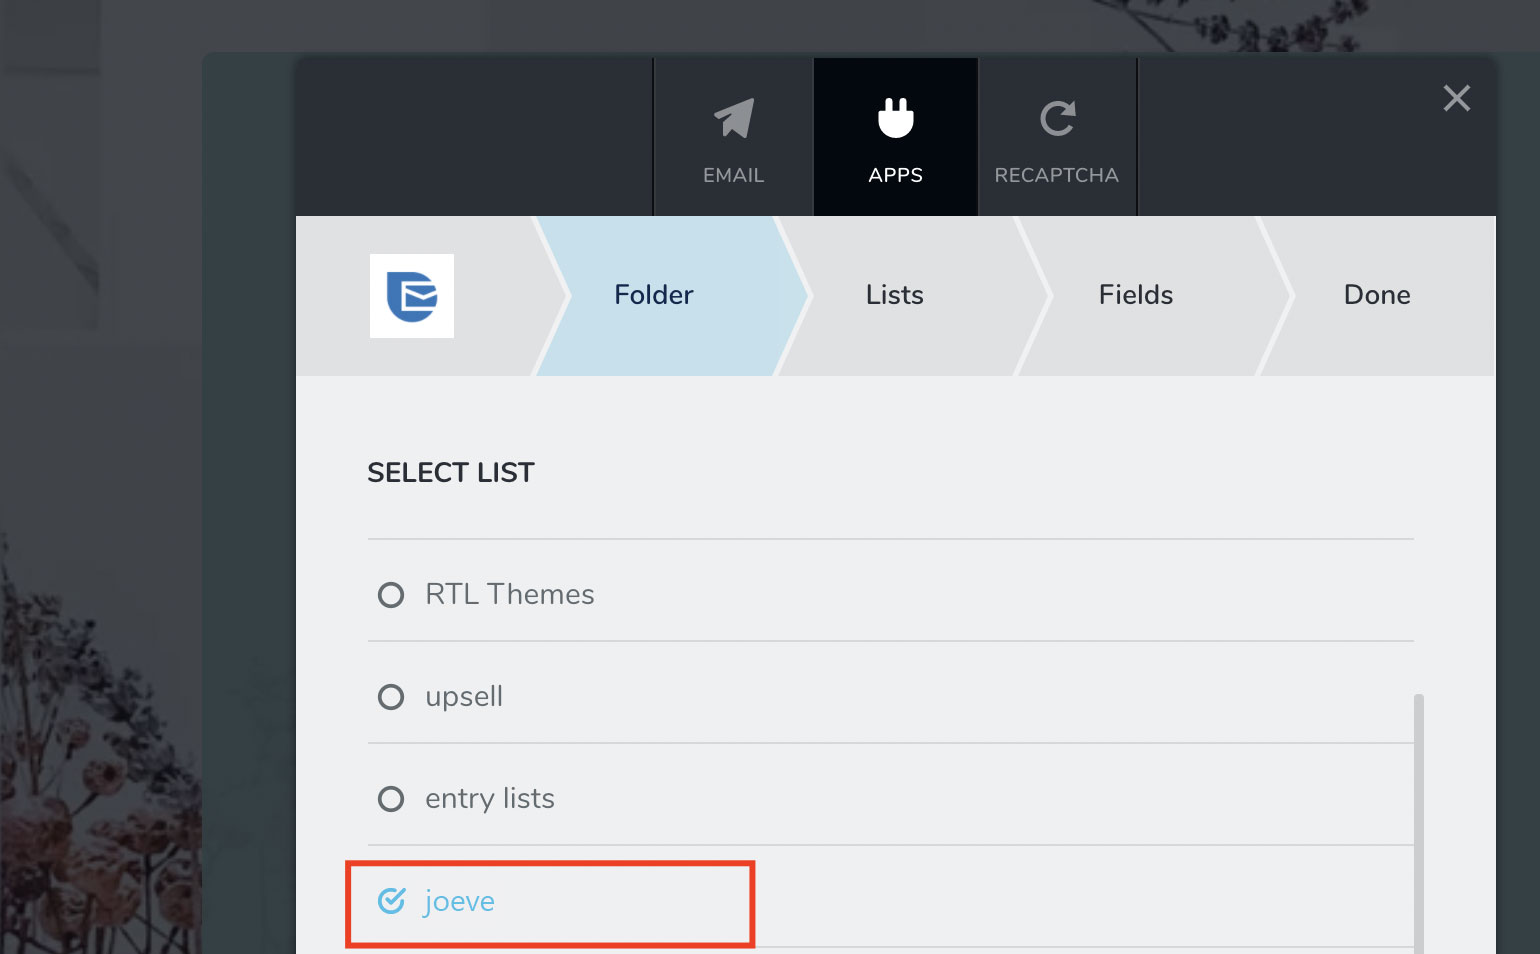
Select one of your Sendinblue folders. You create these in your Sendinblue account.
Step 10.
Select one of your Sendinblue list where you want your lead to be sent (or create a new list directly from JoEve)

Step 11.
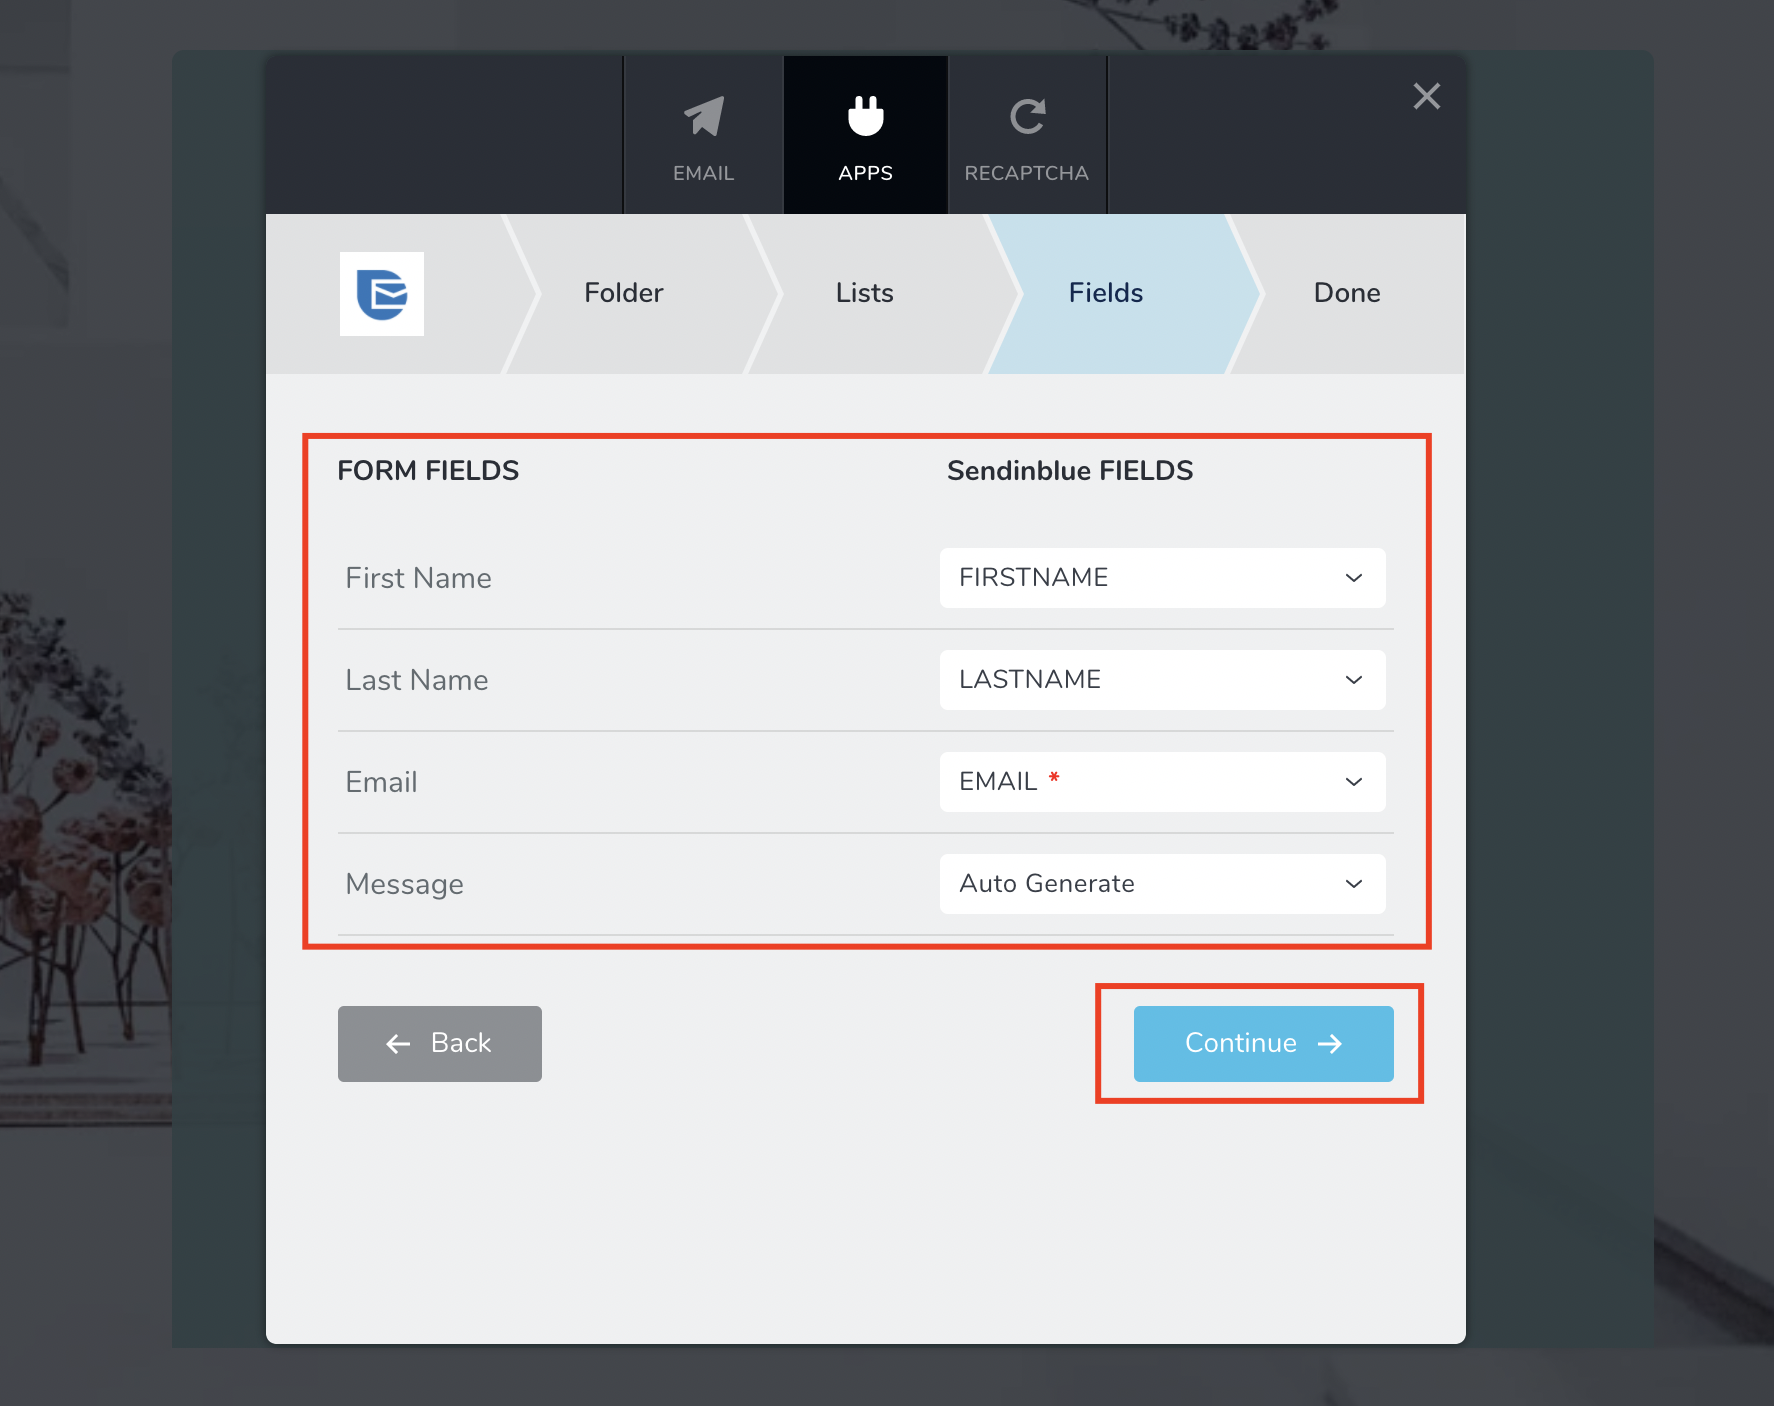
Match your form fields with your Sendinblue fields. Only the email is mandatory. If you don’t have a First Name or a Last Name in your form leave the Sendinblue fields on Auto Generate. Press the Continue button.
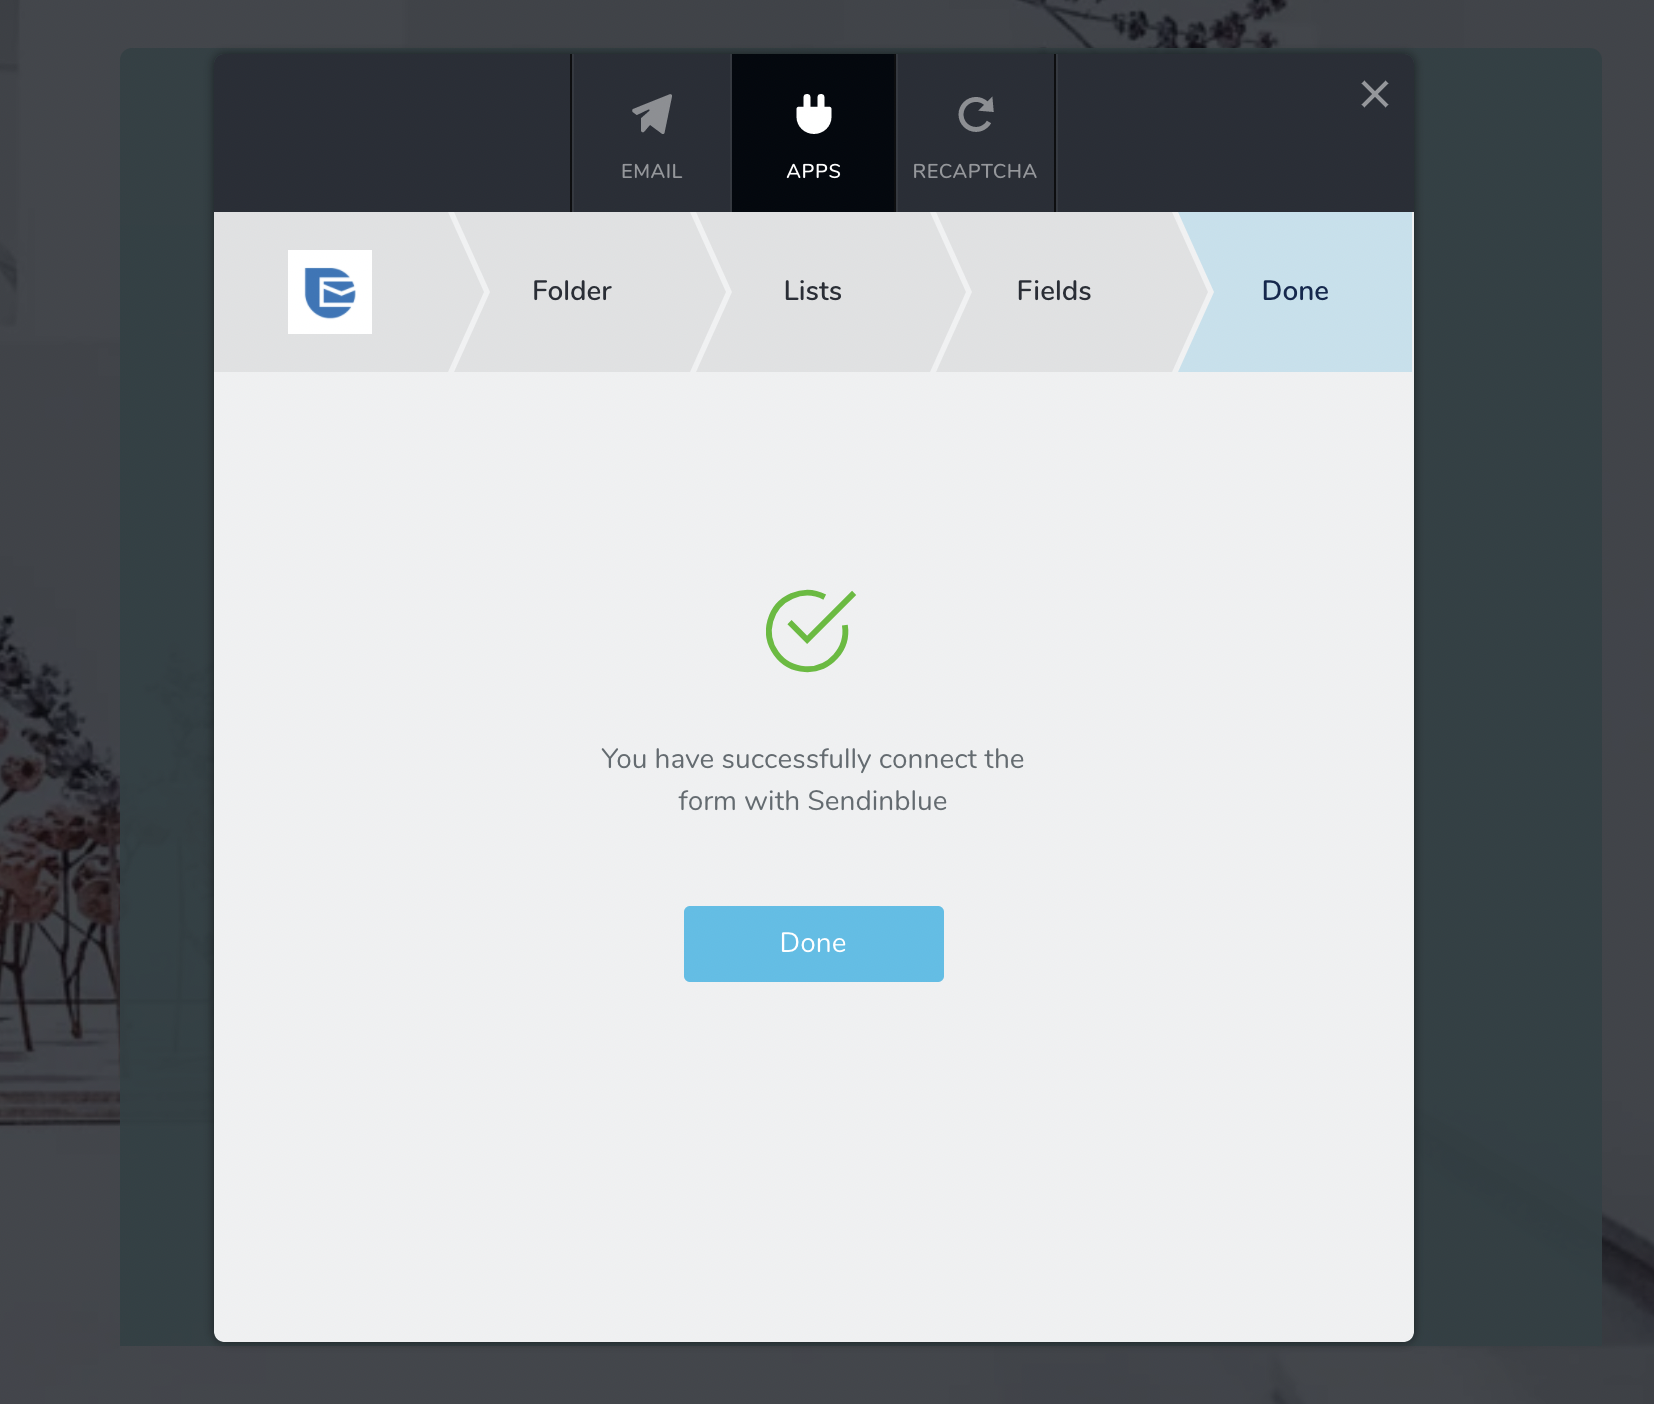
Step 12.
You are done, your form is connected with Sendinblue. Press Done.
Once someone will submit your contact form on the front end
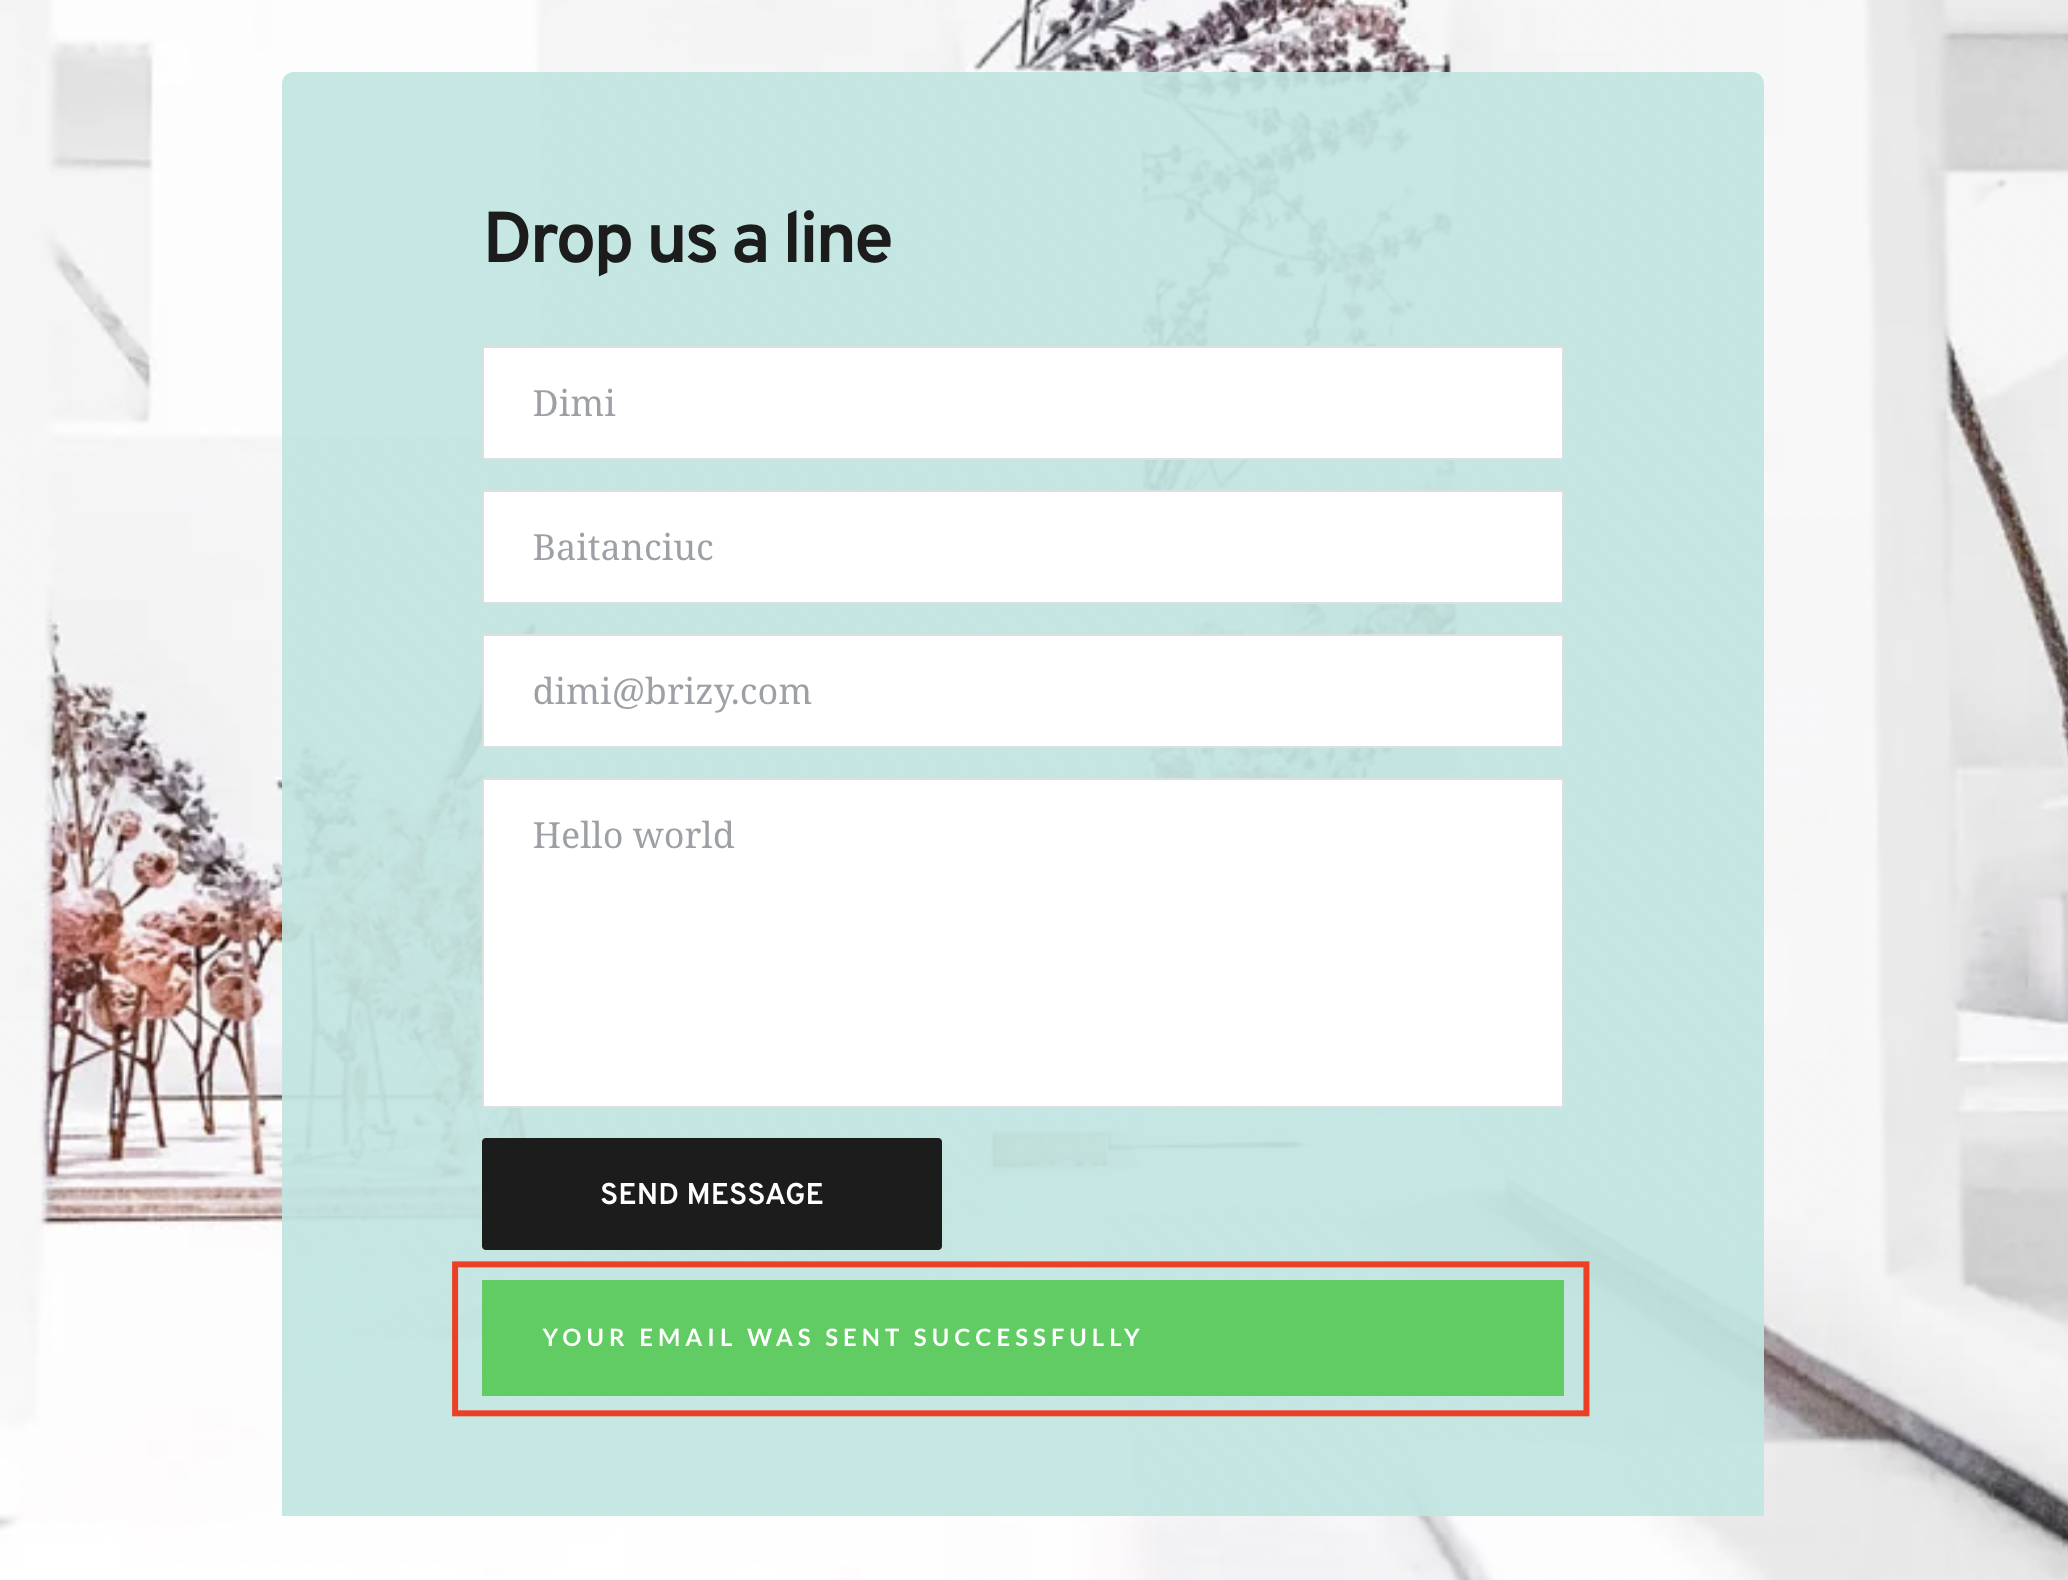
The lead will be pushed to your selected list in your Sendinblue account
Keep in mind: You can receive an email notification on every registered lead.